
I start by selecting colors which match the pattern that I want to create. I generally use FIMO, but had to improvise with some PRIMO orange in this case.

Cut off about a quarter of the bar of clay and roll it into a ball. Keep rolling the ball in the palm of your hand until it is softened and a bit warm.

Roll the clay into a "hot dog" and then extend it into a long tube a little less than 1/2" in diameter. It may be 6"-8" long. Once you start making beads, you will find the right size for your beads through practice.

In this case, I am making one of my "cheetah family" patterns. I am improvising with the back of a razor blade to create a dimple in the clay. This technique is not usually necessary when making beads because every pattern is different. You will see why I chose this technique latter.

Because the spots on a cheetah are varied, i make a few different variations of the pattern.

I know that the next color that I need will be black so I prepare it the same way.

I flatten it out to the need thickness. This thickness will change depending upon the ultimate design that you want to create.

The black clay will be very flexible at this point.
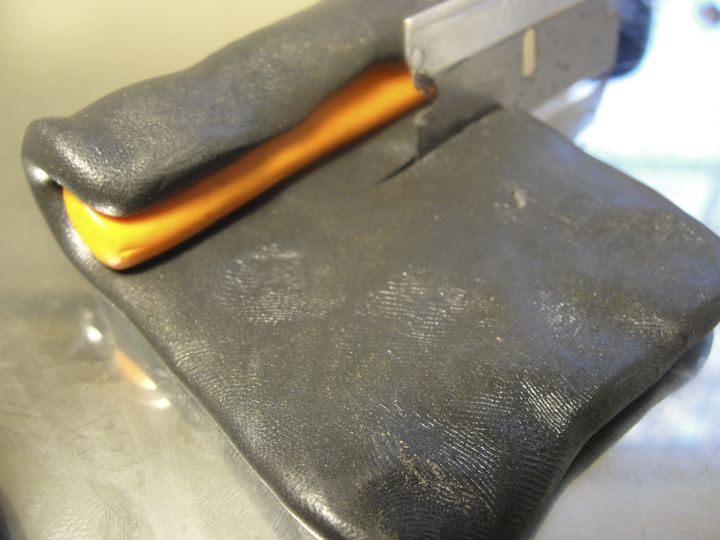
Lay one of the orange tubes down on the black and wrap the black around it as needed.

As you see, some of the orange is not covered completely for this specific design.

Make a flatten layer of white like we did with the black layer and surround the pattern. I used a picture of a similar pattern with gray instead of the orange.

Strategically arrange the four patterns

Roll them out into a long tube.

Roll them out into a long tube.

You will create a roll about like this. I can assure you without a doubt that yours will not look exactly like this. Each time you make this design, it will come out a little bit different.

Here are a few examples of some different patterns and combinations.

Here are a few more. Each of these cane patterns are about the diameter of a quarter. They very in length depending upon how much of each color combination is used. These will all be used in my animal prints bead collection.

Usually there is a lot of extra clay left over when creating patterns. I like to combine all of the left over clay colors and make a long tube. I will cover this tube with the patterned clay that I have designed in order to make beads of different sizes and shapes.

This is a Tiger Pattern that I made earlier. For the next part of the lesson, I'll be slicing it into very thin sheets and wrapping the pieces around the tube made from the clay scraps. If you don't want to use the tube made of scraps, you can make a solid colored tube.


Here is a design where two different patterns are alternated in order create a bead with multiple colors and patterns.

Here are some different results from my "animal print" collection.

Close up side view.

Roll the tube out until the lines disappear and the surface is smooth. Cut the tube into lengths that you want based upon the size bead that you need to create.

To make a round bead, pinch the edges of the tube to close them, and roll the soft clay around in your palm until you create a ball. I like to stick an eye pin through the center of the bead, because I know that I will be making an earring with it once I bake it and make it hardened.

Here are some disk shaped beads simply made by flattening the round beads while they are still soft.
 Here are a few beads that have been baked and are ready for use.

No comments:
Post a Comment